
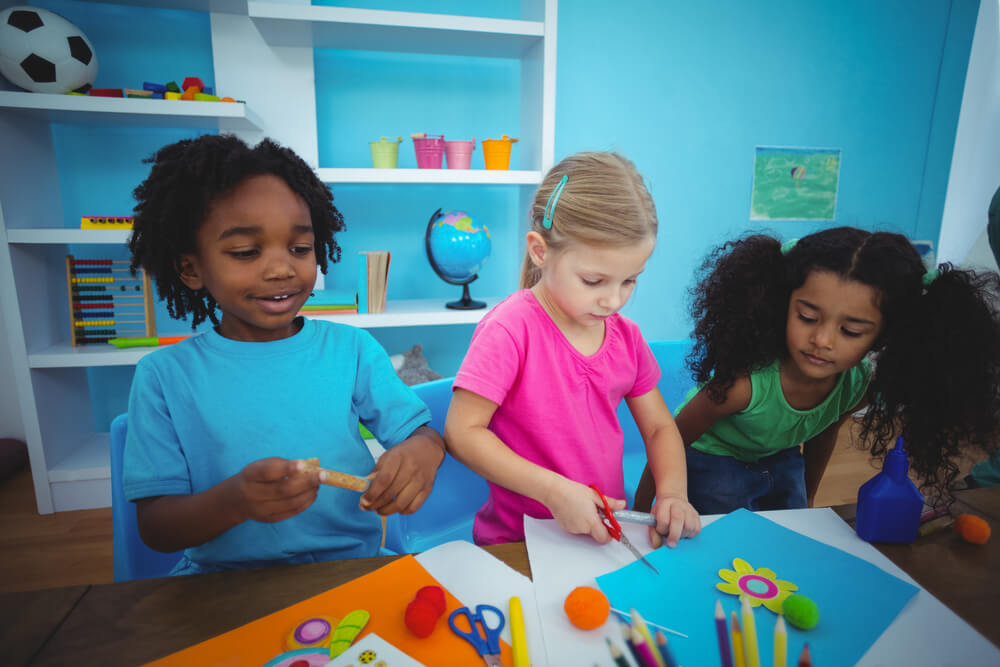
“The creator is an innovator, a problem solver, an entrepreneur, an artist,” says Doireann O’Connor, an early childhood education specialist. Robyn Shulman, a teacher and contributor at Forbes.com, agrees and adds that “As parents and teachers, it is our place to encourage creativity and teach our children to embrace it.”
It’s all good and well to understand the importance of creative activities for kids, but identifying the appropriate ones can be a challenge. We spent some time searching for the best crafts for kids.
Now, all you have to do is roll up your sleeves and enjoy these 12 crafts that won’t take much time to create.
1 Fluffy Non-Sticky Slime
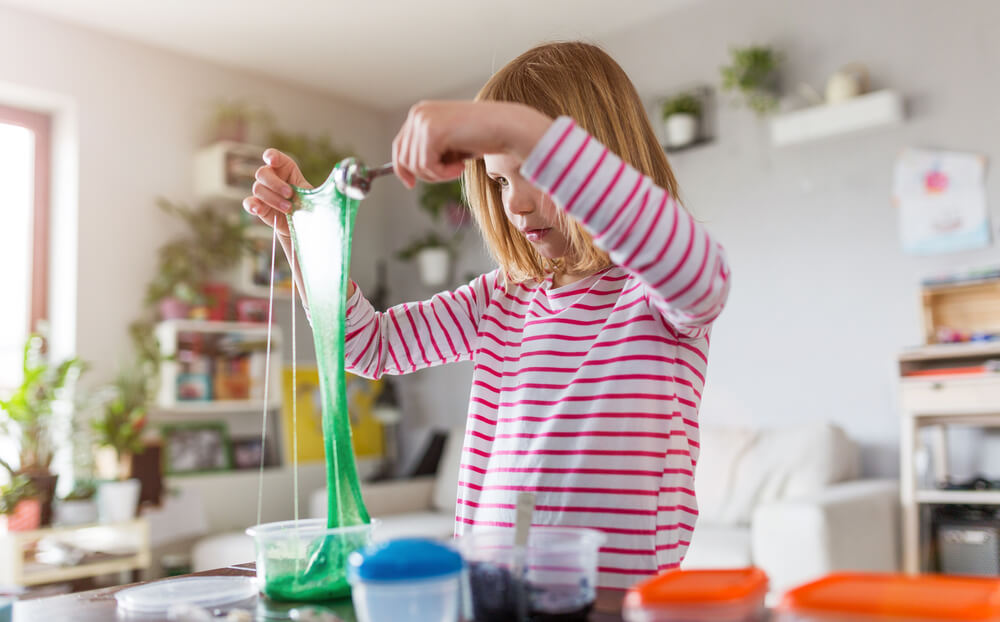
Kids love to get messy, and slime satisfies this craving and encourages their creativity. It’s 100% kid-friendly and non-toxic.
To make it, you’ll need:
- Elmer’s Glue-All Glue – 1/2 cup
- Shaving cream – 1/2 cup
- Contact saline solution with boric acid – 1/2 tablespoon
- A large bowl
- Plastic spatula
- Measuring cup
- Add a pop of color
Procedure
- Measure the glue, pour into the bowl, add a few drops of coloring, and stir.
- Measure the shaving cream, add to your mixture, and stir until it’s fluffy.
- Add the contact solution a bit at a time to serve as glue and keep the fluffy slime together.
- Knead the slime with your hands.
So what do the kids use the fluffy slime for when they are done with this activity? Alina Bradford writes for Cnet.com and has the answer: “Squishing it between your fingers can … be a great way to relieve stress.”
Source: ArtfulParent.com
2 Play Dough

Using play dough for quick and easy crafts has many benefits. It helps develop fine motor skills, improves social skills, and keeps children busy and out of mischief.
To make play dough, you need:
- All-purpose flour – 2 cups
- Salt – 3/4 cup
- Tartar cream – 4 teaspoons
- Lukewarm water – 2 cups
- Vegetable or coconut oil – 2 tablespoons
- Food coloring
- Quart-sized bags
Procedure
- Mix the flour, salt, and cream of tartar in a large bowl. Add water, oil, and color.
- Cook over medium heat, stirring till the dough becomes a lump and forms a ball.
- Place inside the bag and let it cool slightly, then knead it till it is smooth.
- Divide and add color to each dough.
- Store the dough in the bag to keep it soft.
Now that your dough is ready, add glitters to give it an extra shine. Cut it in your desired shapes, such as letters or hearts.
Source: IHeartNaptime.net
3 Origami Cat
Origami is an excellent way to assist children in developing mental concentration, hand and eye coordination, and fine motor skills.
We tried to create a step-by-step procedure for making an origami cat and got confused halfway through the process. To spare you the grief, we will leave you to watch the video below:
4 Tin Can Windsocks
Using recycled materials to make crafts is a fun way of teaching kids the advantages of recycling.
To make windsocks, you need: a recycled can, paint, glue, and ribbons.
Procedure
- Get an empty tin.
- Remove the cover on the tin if it has any and clean it.
- Paint the tin and make it colorful.
- Glue the ribbons onto the inside of your tin.
- Leave it to dry, then hang it.
Now that you have done all the work, it’s time to enjoy the fruits of your labor. Display the windsock in your favorite place at school or home.
5 Funky Hats
If you wonder what to wear on crazy hair days, we have an idea you will like: Funky Hats.
Materials needed:
- A hat
- Old fabric scraps
- Trinkets
- Glue
Steps
- Gather a variety of hats, fabrics, ribbons, stickers, trinkets, and toys.
- Let the kids choose the materials they want to decorate their hat with, using glue to attach them.
Check the funky paper hat in the video below and if you can make one for yourself.
Source: Pinterest
6 Grow an Egg
To grow an egg, you need:
- Egg carton
- Scissors
- Paint
- Brushes
- White canvas
- Hot glue
Procedure
- Trim the edges of the cups of the egg cartons.
- Paint the egg carton pieces green and set them aside to dry.
- Paint the trunk of the tree on the canvas.
- Hot glue the green egg carton pieces to the canvas to make it look like a tree.
Watch the video on youtube to see what your tree should look like.
Source: Gluedtomycraftsblog.com
7 Hand Print

You can never go wrong with handprint images. Once the kids get started, it will be a challenge to stop them.
Here are the materials you need:
- Sugar
- Cornstarch
- Coldwater
- Food coloring
Procedure
- Mix 4 tablespoons of sugar and 1/2 cup of cornstarch in a pot.
- Add 2 cups of cold water.
- Cook the mixture on medium heat till it becomes thick.
- Cool the mixture and pour into small containers.
- Add your food coloring, and start painting.
- Pour the paint into a large bowl.
- Wait for the paint to cool down completely.
- Dip your hand in the paint.
- Press your hand onto the cardboard.
- Repeat till you are satisfied with the product.
Source: Pinterest
8 Make Binoculars

Even though these binoculars will not make you see very far, they are a fun craft that can keep children doing something they can be proud of.
Materials needed:
- Paper rolls (2)
- Glue
- Ribbon
- Scissors
Procedure
- Glue the two paper rolls together from the sides.
- Make a hole on the upper left and right sides of the binoculars.
- Tie your ribbon through the holes and make a neck strap for the binoculars.
- You can paint the binoculars or decorate them whichever way you want.
Watch the video below and learn how to make your own binoculars.
9 Sunflower Paper Plate
Help the kids to make an adorable sunflower plant with paper plates and let them decorate their rooms.
Materials needed.
- Paper plate
- Yellow and black paint
- Glue
- Scissors
- Bubble wrap
- Green cardboard
- Brush
Procedure
- Paint your paper plate yellow.
- Cut a circle out of a bubble wrap and paint it black.
- Use scissors to make slits around the paper plate to serve as petals, then glue the black bubble wrap in the middle.
- Glue a strip of green cardboard at the bottom to represent the stem.
- Your paper plate is ready for use.
Source: Iheartcraftythings.com
10 Toilet Paper Roll Train
This is yet another craft activity you can use to teach your kids about recycling, and you can rest assured they will have fun doing this activity too.
To make your train, you need:
- At least six paper rolls
- Hot glue
- Scissors
- 20 plastic water bottle lids
- Yarns
Procedure
Here is an excellent video from the Opelika Public Library to show you how to do your toilet paper roll train.
11 Snake Rock Craft
This snake rock craft will excite the kids and help them create a decoration they will feel proud of.
Materials needed:
- Small flat rocks
- Glue
- Markers
- Red ribbon (about 2cm)
Procedure
- Arrange the rocks next to each other to form a snake.
- Use the marker to draw eyes on the front rock and patterns on the body.
- Cut the ribbon and glue it to the tip of the first rock to serve as the tongue.
12 Mouse Rock

Want to see the closest thing to a real mouse? Follow the instructions below.
Materials needed:
- Rock (find one as close to the side of a mouse as possible)
- Glue
- Grey paint
- Grey and pink felt
- Marker
- Yarn
- White paper
Procedure
- To make a mouse rock, look for a slightly big rock that can pass for a mouse.
- Paint the rock in grey.
- From the white paper, cut two circles and glue them to the front of the rock to serve as the eyes.
- Use your marker to draw a smaller black circle inside the white circle for the eyes.
- Use the marker to draw whiskers and a mouth.
- Cut the grey felt in the shape of an ear and glue at either side of the face.
- Cut the pink felt into a smaller ear shape, and glue it inside the grey ear.
- Cut another pink felt in the shape of a triangle for the nose.
- Glue the yarn at the back of the rock for the tail.
Source: IHeartCraftyThings.com